Installing a camera into the position
Ahoj! In this section, will read about options, hints and some requirements for installing your new camera into position, pointing it to the sky, and finalizing the cabling.
Sealing the Housing
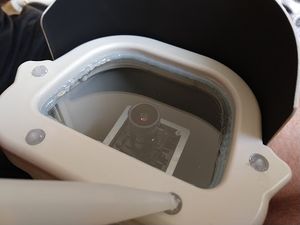
Depending on your climate, its usually advisable to seal up the camera housing against rain and snow.
From the outside, carefully go round the edge of the glass with silicone sealant. Also squirt sealant into any screw holes visible on the front of the camera housing, where it will be most exposed to rain.
But DONT seal up the hinged door because you will occasionally need to maintain the camera, and you don't want to have to prise it open with a chisel!
If there are any cable connections outside the casing, you should also seal these up thoroughhly. This writer can attest to the damage caused by water ingress into a PoE connector! Tape up or seal the connections tightly with some sort of waterproof product (I used electrical tape), but remember you may need to change the cable, so don't seal it irreversibly.
Mounting OutsideMount the camera somewhere with a good view of the sky and without too many 'terrestrial' obstructions such as trees, hills and buildings. Take special care to angle well away from security lights. These lights emit infrared and without the IR Block filter, the IMX cameras are extremely sensitive to this. When locating the camera, bear in mind that you will need to be able to get to the camera to maintain it. The cameras do not need to be high up as long as they have a good view of the sky. Mine are at eye-level on my observatory shed. As before, don't worry if its not practical to eliminate all obstructions as you can mask off any that can't be avoided. Aiming the CameraThe cameras have a field of about 40-45 degrees vertically and 90 degrees horizontally so angle the camera upwards at between 35-45 degrees, higher if you have lots of nearby hills or trees. This should maximise meteor detection. If you can arrange so that the camera view overlaps with other RMS users, thats even better. Check with the network to get an idea of a good direction. In this photo, the camera is aimed up at about 40 degrees, just above the top of the hill behind the camera location. The parts of the hill that are visible will be masked off in the software to avoid 'meteor-wrongs' due to dog-walkers with head torches! |
You are now done with this section and you are about to finish the configuration of the Linux system and add your camera to the production stream on the server side. Almost there! Back to the signpost page.

