Installing OS onto a Raspberry Pi
WARNING: THIS IS A PAGE IN PROGRESS! DO NOT FOLLOW IT IF YOU ARE LOOKING FOR THE BUILDING OF A CAMERA FROM SCRATCH
Ahoj! In this section, you will flash (or install if you wish) an OS Linux onto your SD card or USB flash key and boot your Raspberry Pi for the first time.
OS install
Download the image
Pre-built Images are available with the RMS software pre-installed on Raspbian. Raspbian is the operating system typically used on the Raspberry Pi.
The current publicly released images of RMS are: RPi3B+ and RPi4 .
Install Balena Etcher
The image is flashed to the microSD card using the Etcher utility for Windows (32 or 64-bit), MacOS or Linux (64-bit), which can be found here
Flash a pre-built image to an microSD card or a USB flash key
The process is the same for an microSD card or a USB flash key, just the target will differ.
When you first boot up the Pi make sure you have a keyboard, monitor and mouse attached as you will be taken through a setup process by the RMS software.
Please see the Quick Start Guide about how to flash them to an SD card.
Notes:
- the pre-installed RMS software images incorporate an auto-updating feature, so that the RMS software is updated to the current release whenever your Raspberry Pi RMS is booted. This way, your station is always running the most recent set of updates.
- For installations into other Linux or windows environments, executing the command git pull will update to the most recent RMS release.
- The code was designed to run on a RPi, but it will also run an some Linux distributions. We have tested it on Linux Mint 18 and Ubuntu 16. For information on installing into other Linux releases, check portions of the section listed below for installing on RPi, and also check installation instructions found on GitHub
This page is meant for the people who would like to boot a Raspberry Pi directly from a USB device and would like to avoid using a microSD card due to various reasons e.g. USB 3.X devices are faster, by some considered more reliable or simply some of them are available unused at your disposal. This page deals with and brings the how-to for the Raspberry Pi 4B only. In general Raspberry Pi 4B is able to boot from any USB device out of the box. Please see the caveats section for the possible issues you may encounter and how to solve them. As such Raspberry Pi 4B can be booted from a USB flash, USB-attached Solid State Disk (SSD) or USB-attached Hard Disk Drive (HDD) either 2.5” or 3.5”. The list of proven devices that are in use by other members will be provided in each section. The easiest setup with almost no caveats comes with a USB flash drive which is as easy as booting from a microSD card. By using a USB-attached SDD or HDD there are some things you need to consider.
USB flash disk
How-to
- Download the zipped Image for Raspberry Pi 4B here and save it on the PC somewhere.
- Download the BalenaEtcher, if you haven’t done it yet.
- Insert a USB flash disk into your PC, and note the letter it was assigned.
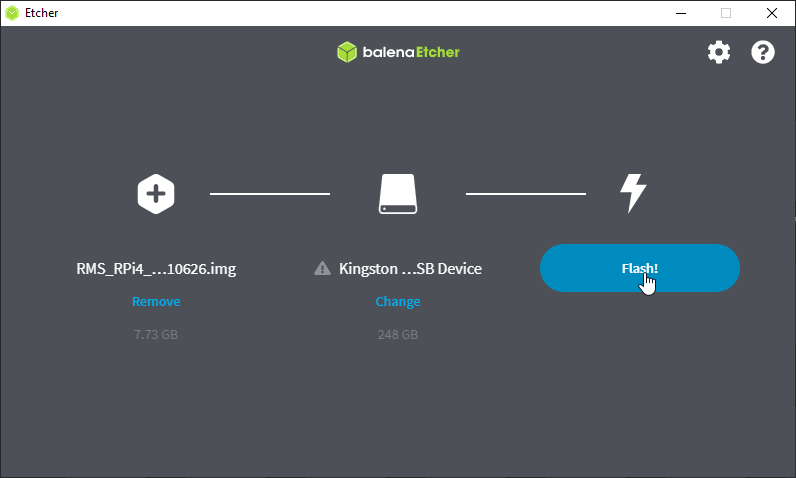
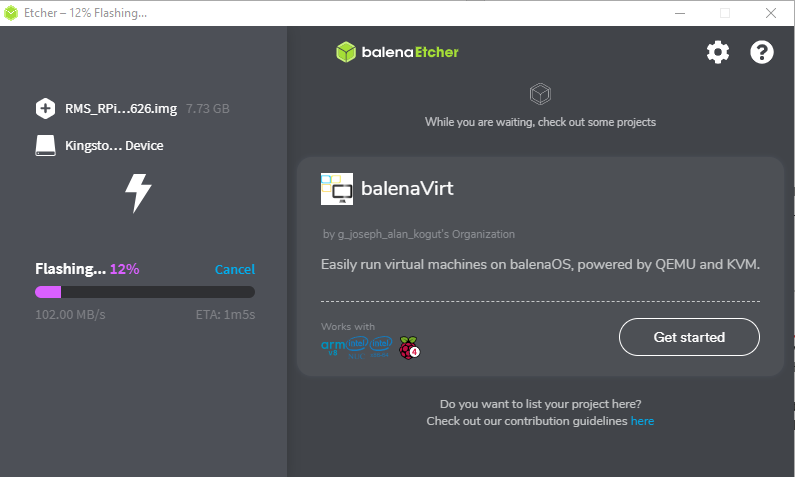
- Run BalenaEtcher, and flash the image file onto your USB flash disk: Select Flash from file, find your zip file and select it. As Target select your USB flash disk. Normally the system disks are hidden but verify the name, letter and size of your USB flash disk to be sure you have the correct target. Click Flash, once again verify the target and confirm it. Wait for the process to finish. (In case you will receive an error you may need to run BalenaEtcher as administrator)
- Eject the USB flash disk in windows if necessary and then remove your USB flash disk from your PC and insert it into your Raspberry Pi, which should be connected to a TV or Monitor, and have a keyboard and mouse connected. Power on a Raspberry Pi. Make sure that a microSD card is not inserted.
- Wait for the boot. If the boot takes too long to occur, please have a look at the next section. If it booted successfully, follow the on-screen instructions. You may return to the previous page as you are done with flashing the image onto a USB flash disk.
This is what the selection should look like:
This is what the process should look like:
Pre-2021 Raspberry Pi 4 Bootloader update
If you encountered a problem booting Raspberry Pi 4 from a USB device (common for all USB devices, not only flash disks), the most probable reason is that your Raspberry Pi 4 is from an older batch and its bootloader has to be updated. The procedure is simple and you will need a blank small MicroSD card to continue, the data are around 1MB in size, so any small microSD card will do the job. The process is nicely described in the raspberry pi official documentation.
NOTE:
- In case you are looking for more extensive USB booting guide click here
[OPTIONAL] Install the software from scratch
Note: if you're setting up a Raspberry Pi you should use the prebuilt image as this comes with all necessary software installed and is ready to use.. If you really really really do want to install on the RPi from scratch, you can follow the instructions below:
Install for Raspberry Pi 4
Detailed instructions here
Install for Raspberry Pi 3
We no longer recommend the Pi3, as it doesn't have the performance or memory to handle busy meteor showers.
Detailed instructions here.
Install for Linux
Detailed instructions here
Linux GUI and multi-Camera support
Detailed instructions here
Installation for Windows
Data capture does not work under windows. However you can use the other tools on your PC, where its much quicker to run SkyFit2 to calibrate your camera to the sky, or you want to use BatchFFToImage to convert data to jpeg format to share on Social Media.
Click here for detailed instructions. The instructions were tested on Windows 10 64-bit, but should work on any Windows version where git and Anaconda are available.
Aside: If you are a Windows whizz, please feel free to investigate why data capture doesn't work!
Installation for MacOS
As with Windows, installation for MacOS is useful if you want to analyse the data offline. If you do want to install it, please follow the instructions here.
You are now done with this section and now you are going to focus your camera and put all bits and pieces together for the first test. Exciting, isn't it? Back to the signpost page.

