Build A Camera
Parts and Tools needed
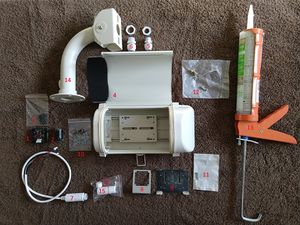
Click on the image to the right to see a larger version with the parts labelled
- IMX291 sensor board
- Lens with the lens holder - 4mm, 6mm are M16 mount as pictured, while other lenses might be CS which have a different holder
- 2x M2 screws
- Camera housing
- Small cable gland
- Large cable gland
- Camera PoE cable (sometimes called a network cable by the sellers)
- Camera board holder
- Holder metal plate
- 3x M2 screws, 12 mm long
- 1x M3-.50 screws, 6mm long
- Metal plate screws supplied with the housing
- Transparent weatherproof silicone
- Housing mounting bracket
- Waterproof ethernet cable protector
- Pair of PoE adapters (not shown) or a PoE injector (not shown), to supply 12v to the camera.
- 12V power supply for the camera (not shown)
Where should I get all this stuff, you say? Here the up to date list of sellers: LINK
Some cameras come with a slightly different cable with a separate 12v socket for power input as shown here. If you have this cable you will need a pair of PoE adapters (seen in that picture in the background). If your camera has a single cable as shown in the main picture, you will need a PoE injector or single adapter.
You will also need small wire cutters and various size screwdrivers, plus a drill and suitable screws to attach the bracket to a wall.
To test and focus the camera you will need VLC. This software is preinstalled on the Pi but is also available for Mac, Windows or Linux from here.
Notes on Purchasing
- The Camera, lens and camera PoE cable should be bought together to ensure they're compatible.
- The camera housing, board holder, plate, cable glands and mounting bracket normally come together too, but you may need to ask the seller to include the camera board holder and bracket.
- The camera and housing can be bought from AliExpress. There may be other sources but we have yet to find any reliable ones.
- Other items can be found in most hardware stores or your favorite online retailer.
Assembly
[Note: there's a longer version of the camera assembly section of this page available on Google Docs. Please refer to this if you need more information.]
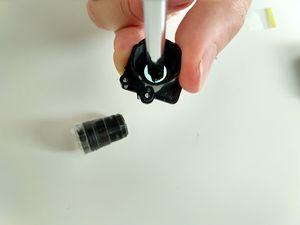
Preparing the Lens
|
Attaching the Lens to the Camera
|
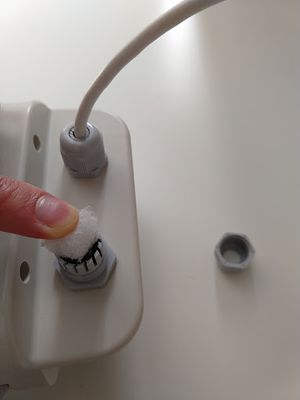
Preparing the Camera Housing
|
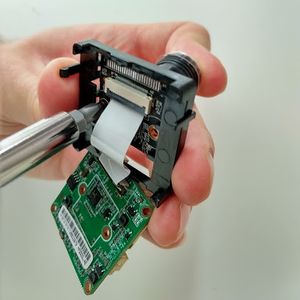
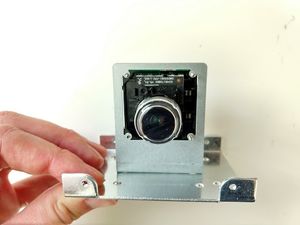
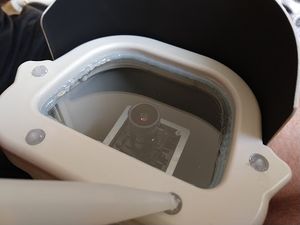
Attaching the Camera
See image for the proper camera board orientation, so the video is not sideways or upside down. |
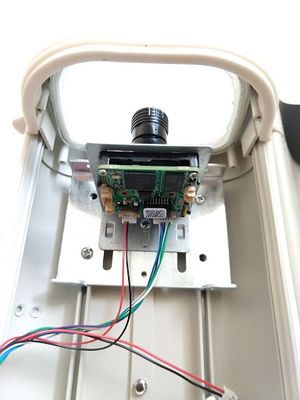
Installing the Camera in the Housing
|
Testing and FocusingAt this point, your camera must be tested and focused. There's no point sealing up the housing and screwing it to the wall if its not working or isn't focused ! Testing the Camera
The Camera PoE cable lights should come on, indicating traffic is flowing. After a few seconds, it should steady down to irregular flashing. If you don't see flashing lights then check the cable connections to make sure everything is plugged in properly. Find its IP AddressThe camera should now appear as a device on your network and to test it properly you will need to find its IP Address. The easiest way to do this is using a free piece of software called [IP Scanner]. Download and run it (no need to install). Click "Scan" and wait till it finishes. The camera can be identified by Manufacturer 'ICP Internet Communications' or 'Motion Control Systems' (see screenshot - i have five cameras!). Checking the Connection
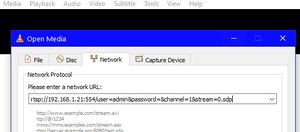
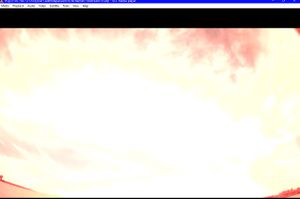
|
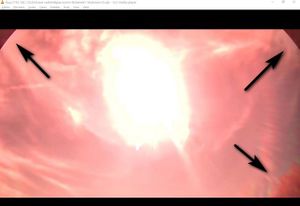
Checking for Obstructions
|
Focusing the CameraThere's a whole separate section of the Wiki on focusing, but here's the short version !!
Note that there's a short lag due to the network, so you should wait a second or two after each adjustment to allow the change to be reflected in VLC. |
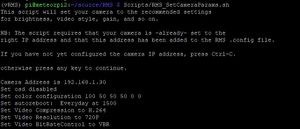
Setting Camera ParametersTo operate at night, the camera must be reset to the correct gain, colour mode and video mode. There are two ways you can do this: Using the CMS SoftwareCMS is a security camera software package you can download from the internet. You can use the CMS software as explained in this video by Denis Vida. Note however that you should reset the network as the LAST thing you do. The video does it a bit soon. Using the RMS software (currently experimental and only for Pi4 systems)NB: this relies on code still being tested - contact us via the groups.io forum if you want to try this method
ping a.b.c.d
python Utils.SetCameraAddress a.b.c.d 192.168.42.10
Scripts/RMS_SetCameraParams.sh
|
Final StepsSealing the HousingDepending on your climate, its usually advisable to seal up the camera housing against rain and snow. From the outside, carefully go round the edge of the glass with silicone sealant. Also squirt sealant into any screw holes visible on the front of the camera housing, where it will be most exposed to rain. But DONT seal up the hinged door because you will occasionally need to maintain the camera, and you don't want to have to prise it open with a chisel! |
Mounting OutsideMount the camera somewhere with a good view of the sky and without too many 'terrestrial' obstructions such as trees, hills and buildings. Take special care to angle well away from security lights. These lights emit infrared and without the IR Block filter, the IMX cameras are extremely sensitive to this. When locating the camera, bear in mind that you will need to be able to get to the camera to maintain it. The cameras do not need to be high up as long as they have a good view of the sky. Mine are at eye-level on my observatory shed. As before, don't worry if its not practical to eliminate all obstructions as you can mask off any that can't be avoided. Aiming the CameraThe cameras have a field of about 40-45 degrees vertically and 90 degrees horizontally so angle the camera upwards at between 35-45 degrees. This should maximise meteor detection. If you can arrange so that the camera view overlaps with other RMS users, thats even better. Check with the network to get an idea of a good direction. In this photo, the camera is aimed up at about 40 degrees, just above the top of the hill behind the camera location. The parts of the hill that are visible will be masked off in the software to avoid 'meteor-wrongs' due to dog-walkers with head torches! |
Thats it!
Once the camera is installed, connect up the PoE adapter, attach a long network cable and run it to wherever you are going to keep the Raspberry Pi. Remember to ask permission before drilling holes in the walls... :)
Now install the Software
Now you can finish configuring the Raspberry Pi by installing a prebuilt image. This is covered in a separate guide here.
